
置 Github 仓库
- Fork 或克隆仓库 https://github.com/eoao/cloud-mail
- 进入您的 GitHub 仓库设置, 添加以下 Secrets
| Secret 名称 | 必需 | 用途 |
|---|---|---|
CLOUDFLARE_API_TOKEN |
✅ | Cloudflare API 令牌 获取API令牌 |
CLOUDFLARE_ACCOUNT_ID |
✅ | Cloudflare 账户 ID 获取账户ID |
D1_DATABASE_ID |
✅ | D1 数据库的 ID 获取数据库ID |
KV_NAMESPACE_ID |
✅ | KV 命名空间的 ID 获取数据库ID |
R2_BUCKET_NAME |
❌ | R2 存储桶的名称 获取数据库ID |
DOMAIN |
✅ | 邮箱域名,多域名用(例如 ["example.com","example2.com"]) |
ADMIN |
✅ | 管理员邮箱地址(例如 [email protected]) |
JWT_SECRET |
✅ | JWT密钥 随便输入一串字符串 |

获取 Cloudflare API 令牌
- 访问 Cloudflare Dashboard
- 点击
创建令牌 - 选择”编辑 Cloudflare Workers”模板
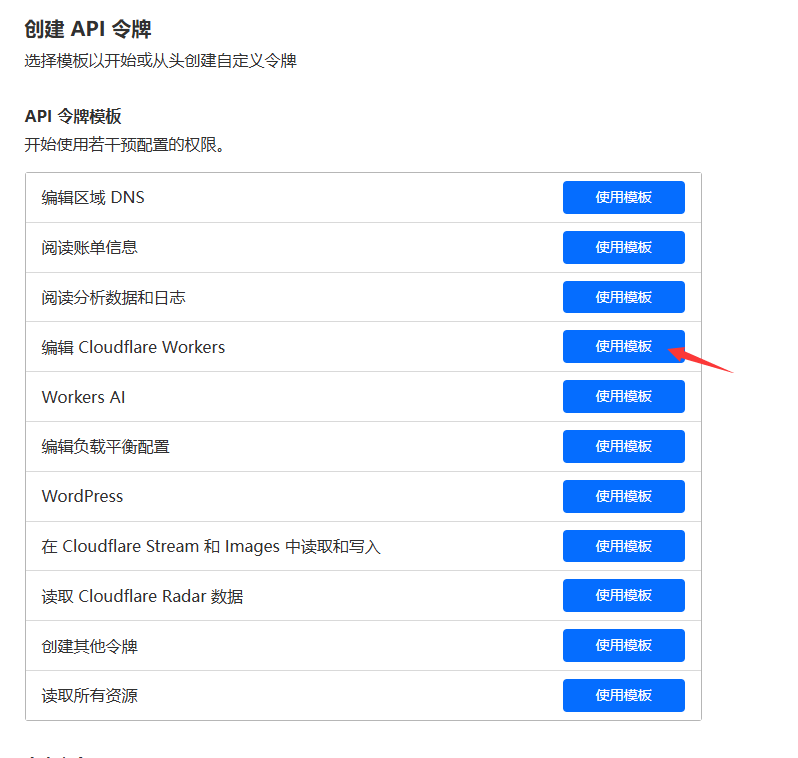
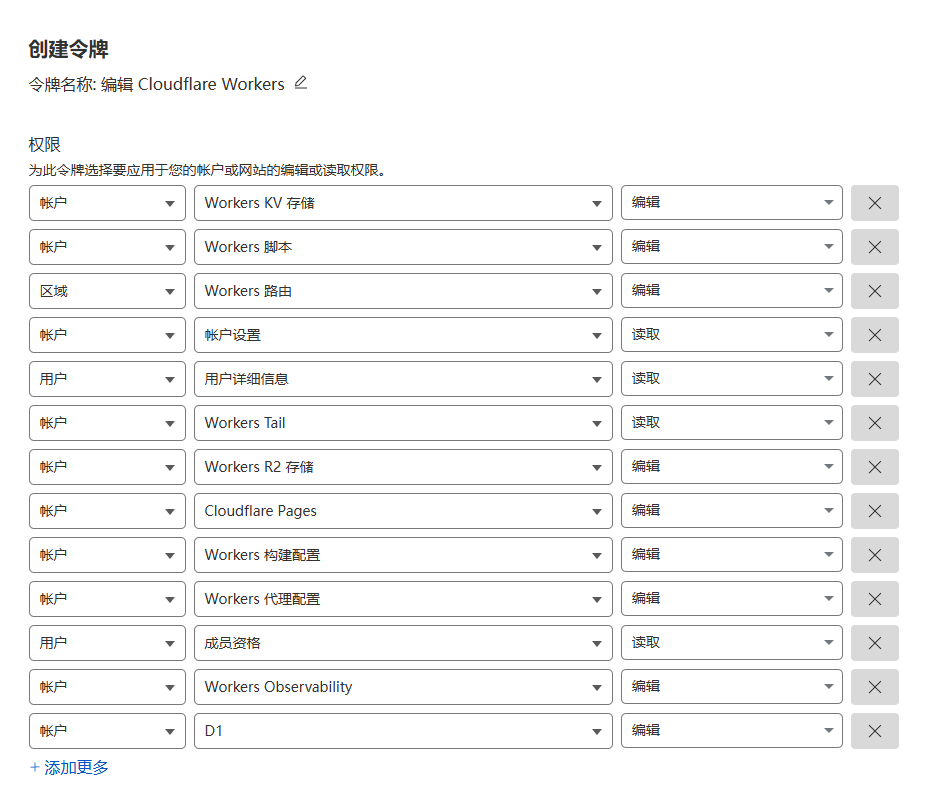
- 并参照下表添加相应权限
- 保存并复制生成的令牌设置到 GitHub Secrets 中的
CLOUDFLARE_API_TOKEN
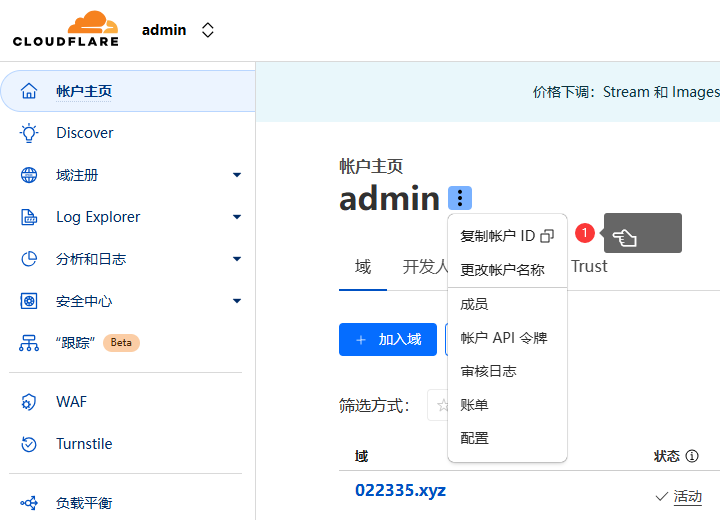
获取 Cloudflare 账户 ID
- 访问 账户主页。
- 复制账户ID到 GitHub Secrets 中的
CLOUDFLARE_ACCOUNT_ID
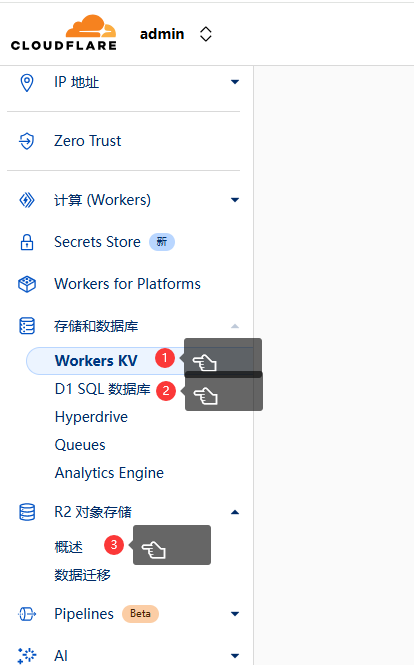
获取 数据库 ID
- 创建 D1 数据库,复制ID到 GitHub Secrets 中的
D1_DATABASE_ID - 创建 KV 数据库,复制ID到 GitHub Secrets 中的
KV_NAMESPACE_ID - 创建 R2 对象存储,设置自定义域,复制桶名到 GitHub Secrets 中的
R2_BUCKET_NAME(可选)
运行工作流
- 在 Actions 页面手动运行工作流开始部署
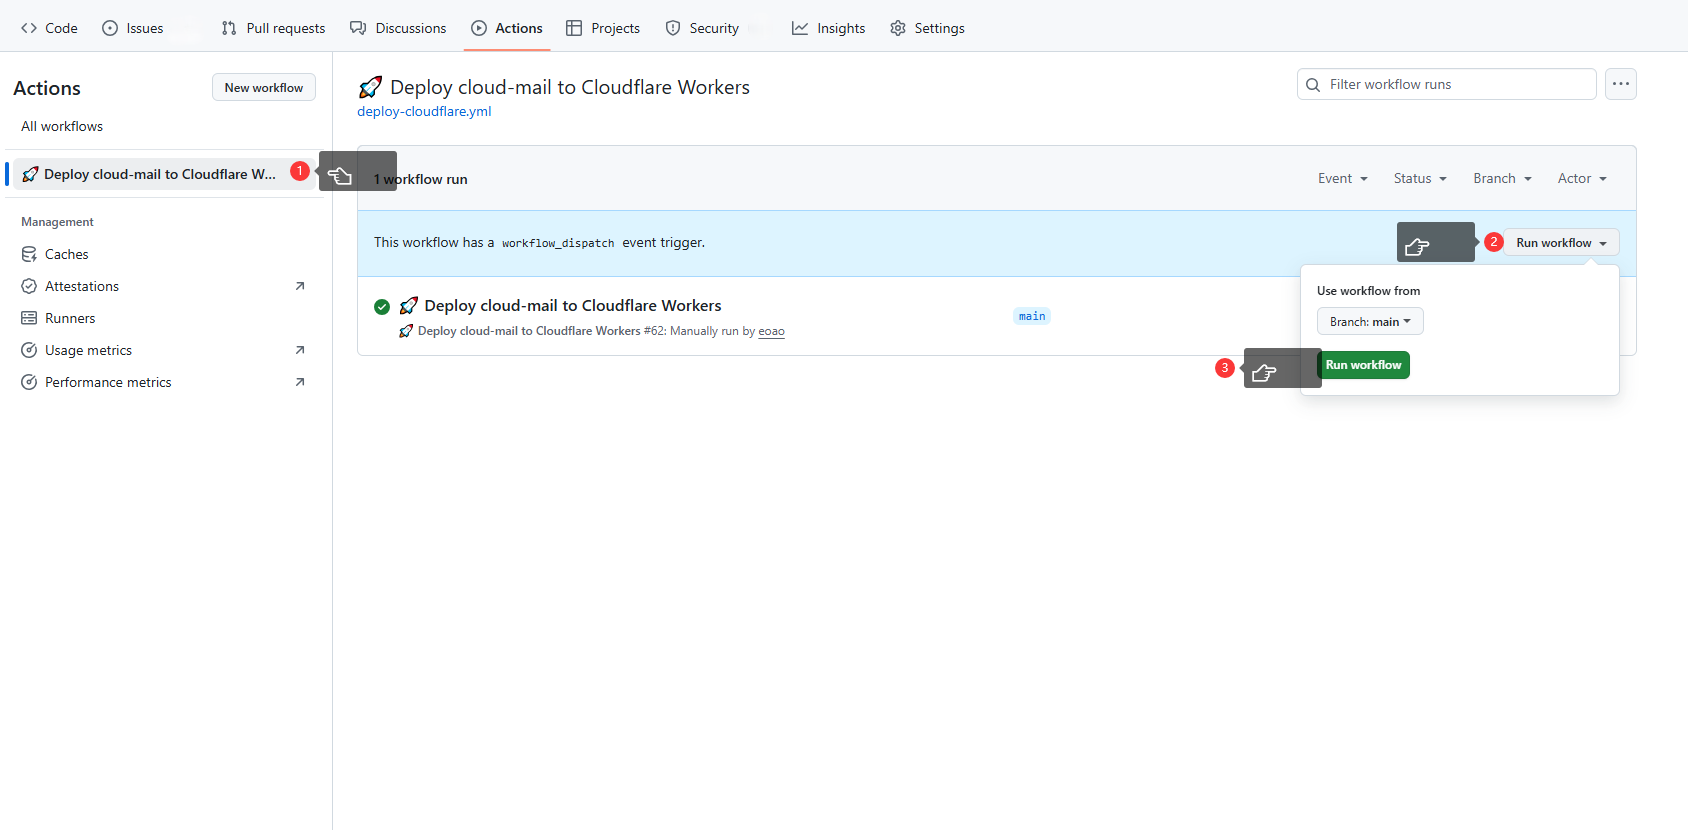
- 在 Cloudflare 界面找到部署完成的 Worker 设置自定义域用于访问网站
- 后续同步仓库后会自动部署到 Workers, 自动同步仓库可使用 Bot 或者手动点击 Sync Upstream 按钮
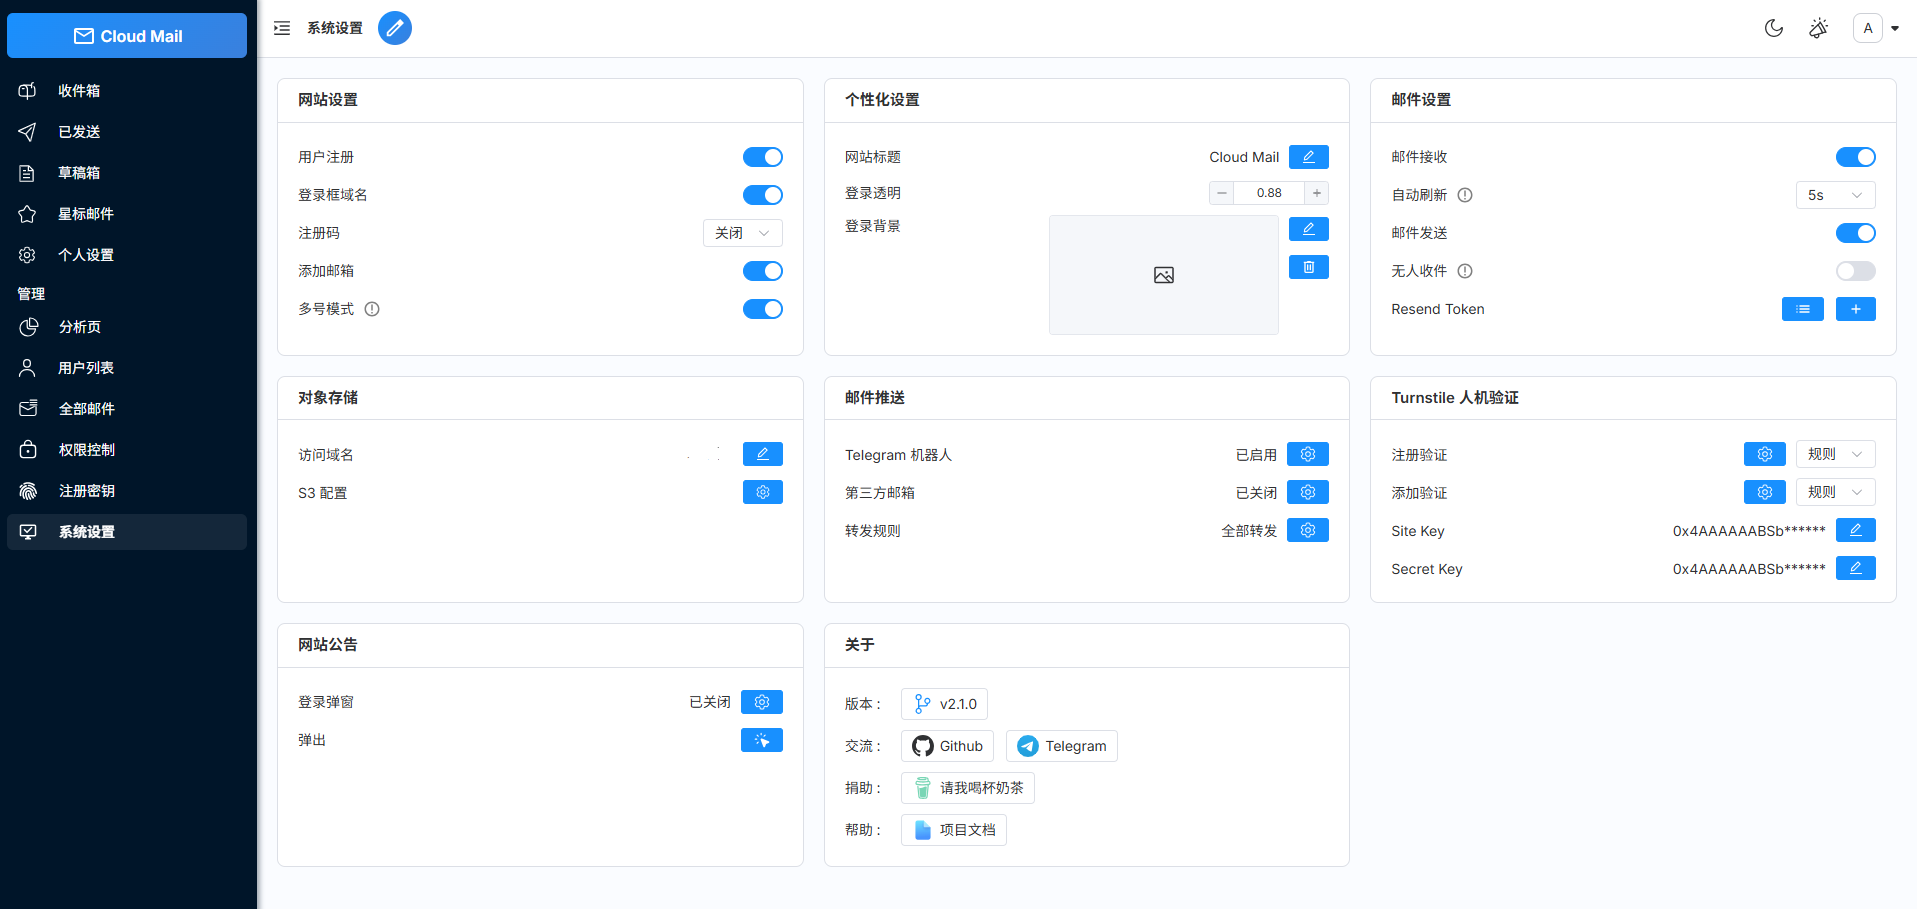
系统功能设置
注册管理员账号并登录,进入系统设置

Alt + K

© 版权声明
文章版权归作者所有,未经允许请勿转载。
相关文章


暂无评论...